Installation step of the AdOpt Cookie Banner
In this guide, we will understand the Installation step of the AdOpt Tag - which is one of the 6 configuration steps for your Cookie Banner in AdOpt. We recommend leaving this step for last and configuring all the others beforehand, as they are prerequisites for the installation to function properly.
This step is intended for the installation and monitoring of the “health” of the AdOpt tag installation on your site. The way the tag is installed can affect its functionality, and this will become clearer in the following steps.
Check out our tutorial on YouTube:
In this guide, we will cover:
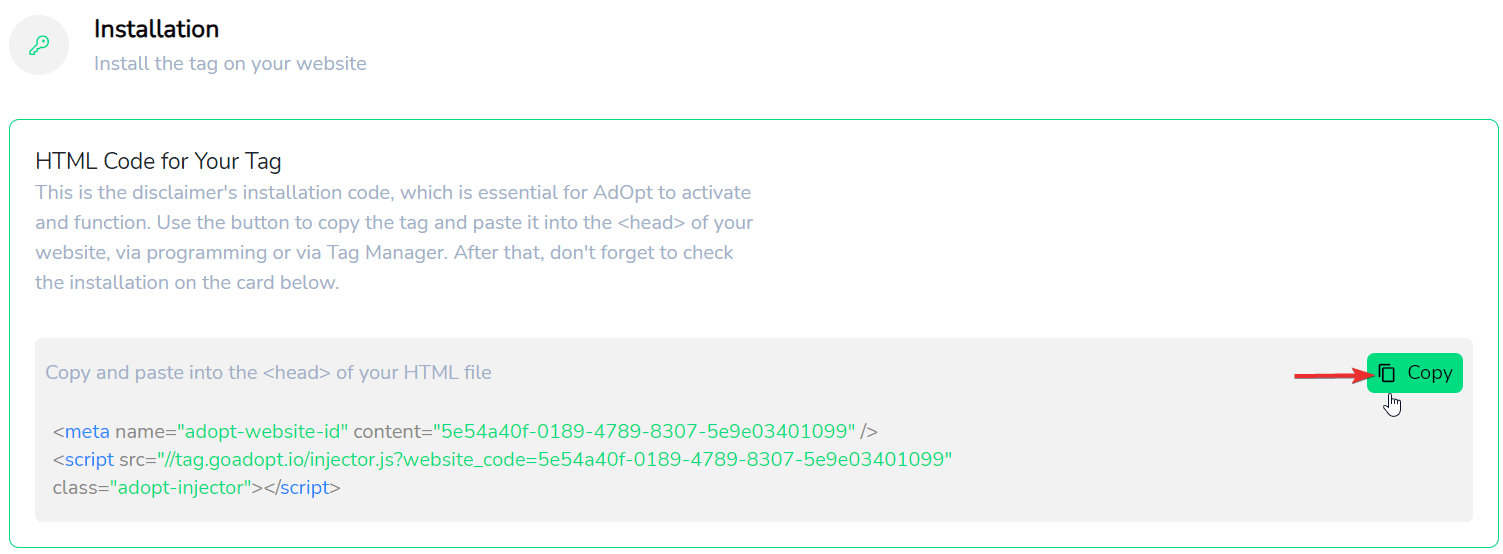
- HTML Code of Your Tag
- Ways to Install the AdOpt Tag
- Installation via Google Tag Manager (GTM)
- Installation via Code
- Installation via Plugin (Tray Commerce; WordPress;...)
- Check Your Installation
- Monitor the Installation
Right after accessing https://dash.goadopt.io, go to the organization and the banner you want to install.
Each Cookie Banner created within your account will have a unique HTML code! Copy your code using the button next to the Tag to avoid selection errors.
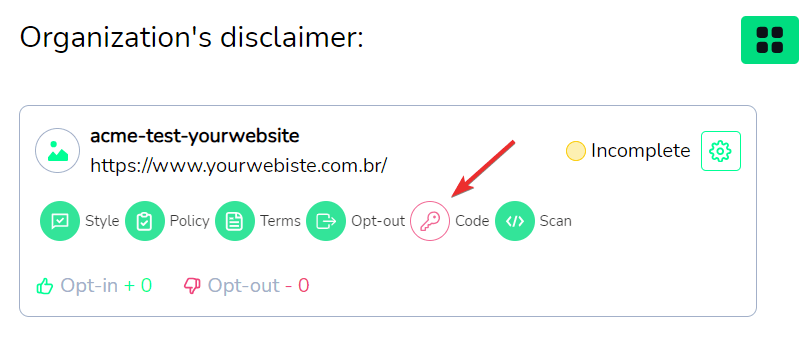
Within the installation section of the banner, copy the Tag using the button on the right to avoid errors.
You can install the tag:
- via Google Tag Manager;
- directly in the code of your site;
- via direct integration plugin (Tray Commerce; WordPress;...)
-
- Go to your GTM: Google Tag Manager
-
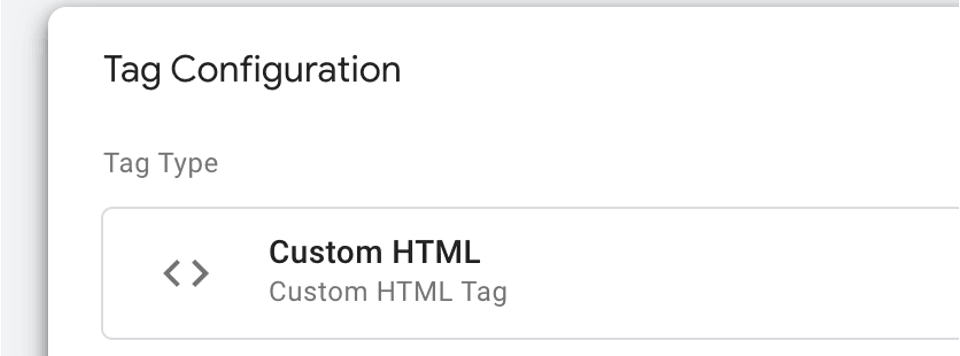
- Create a tag
-
- In your Google Tag Manager, create a new tag by clicking New > Custom HTML.
-
In the HTML field paste the AdOpt disclaimer code.
-
In order to identify the tag later, put a name at the top of the page (example: "AdOpt Tag")
-
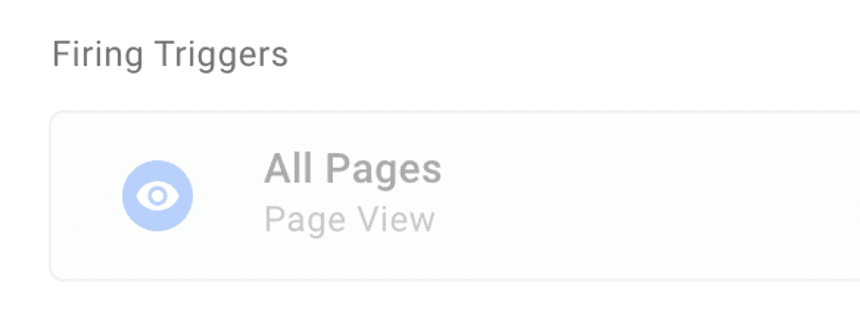
Trigger:
-
Set trigger: all pages
-
In the "x" part, choose all pages
-
Save your changes
-
Click "Save" and the tag is set.
-
Publish/Send the changes
Attention - Saving is not enough, you must publish the changes for the banner to appear on your site.Tip
- Click Submit and then Publish.
- Return to the AdOpt platform, refresh the page and clear the cache.
- After a few minutes, go to the "Install banner" session, click on "Check installation".

The AdOpt platform will scan your site looking for the code installation. This step can take a few moments.

With the acknowledgement of the Tag installation, the installation status will be updated.
Following all these steps your banner will be installed :)
- Paste the TAG in the header of your website.
- Don’t forget to “save” and “publish” the change on your website.
- The performance of the AdOpt tag is very fast. Once on the website, verify the activation of the Cookie Banner and its functionality.
- Return to the AdOpt platform, refresh the page by clearing the cache. After a few minutes, go to the "Banner Installation" section and click “Check Installation.”
You can also install via integration within the platform where your website is hosted.
AdOpt is working to facilitate installation on platforms like Tray Commerce, WordPress, VTEX, and more.
Check the Help Center in the “Platforms and Integrations” section to identify all the integrations available in AdOpt.
Click “Verify Installation” to start an analysis by our system on your site. Each step of the Cookie Banner configuration within the AdOpt platform will be analyzed, followed by the installation on your website - on the URLs registered during the creation of the Cookie Banner.
If you need to change the URLs, go back to your organization's main page and edit the Cookie Banner URLs.
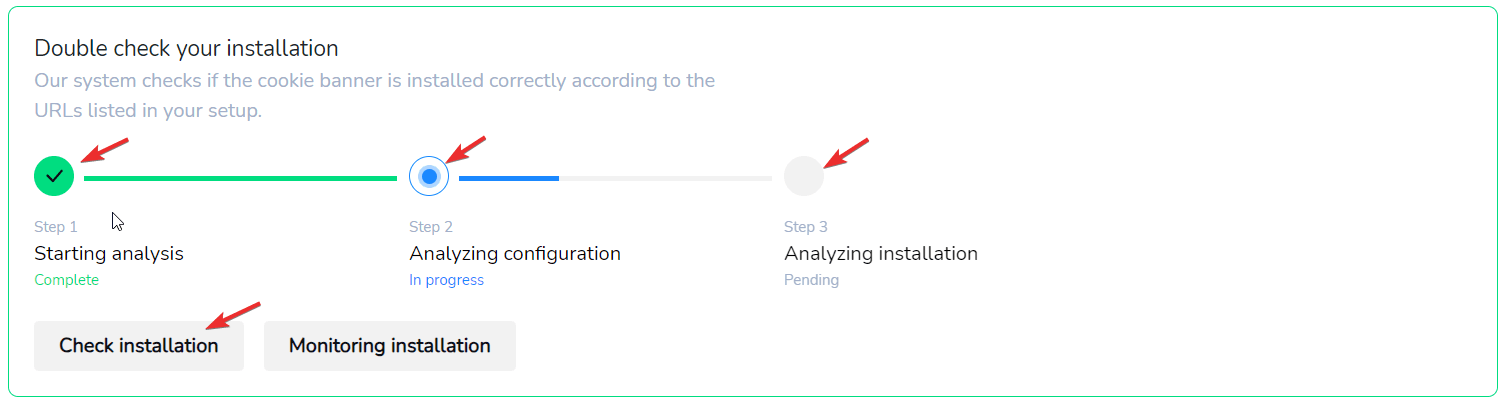
If each step is completed successfully, the Installation step will be updated and marked as complete.
After verifying the installation, the AdOpt system will present an analysis result that may contain: Warnings and Errors
Warnings are system responses indicating whether the code was installed correctly and if any improvements can be made. These do not necessarily stop AdOpt from functioning but may interfere with other functionalities. It’s worth analyzing thoroughly to ensure optimal performance.
A practical example: the Automatic Tag Blocking feature works better when the tag is installed in the of the site. If the installation is in the , the tag will be activated, but one of the functionalities may work partially.
Example of Warnings
Here is a common warning that may appear on your account:

In most cases, warnings do not affect the activation of the tag (and cookie banner), but it is worth analyzing the detailed message:
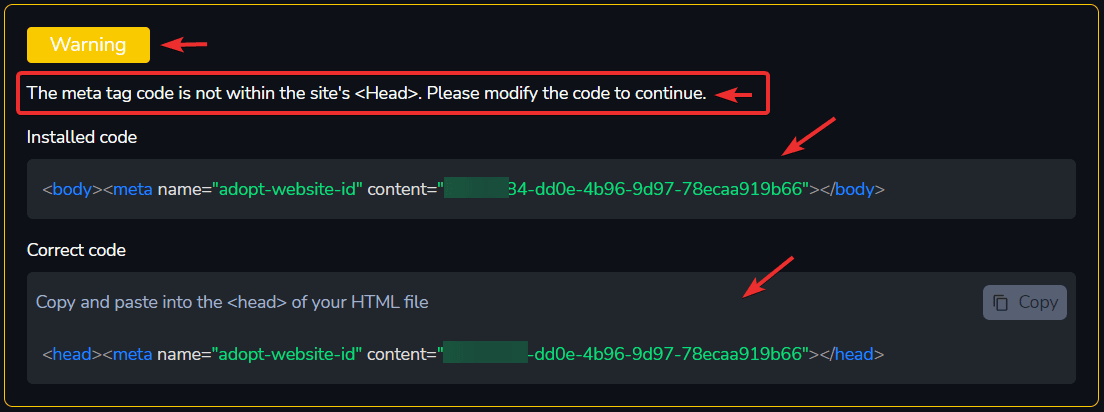
In the case below, the tag is not in the . The tag installed in the will take precedence over other services installed on the site, which can ensure better performance of the AdOpt tag and the proper functioning of other features that depend on AdOpt being activated before the services listed in the banner.
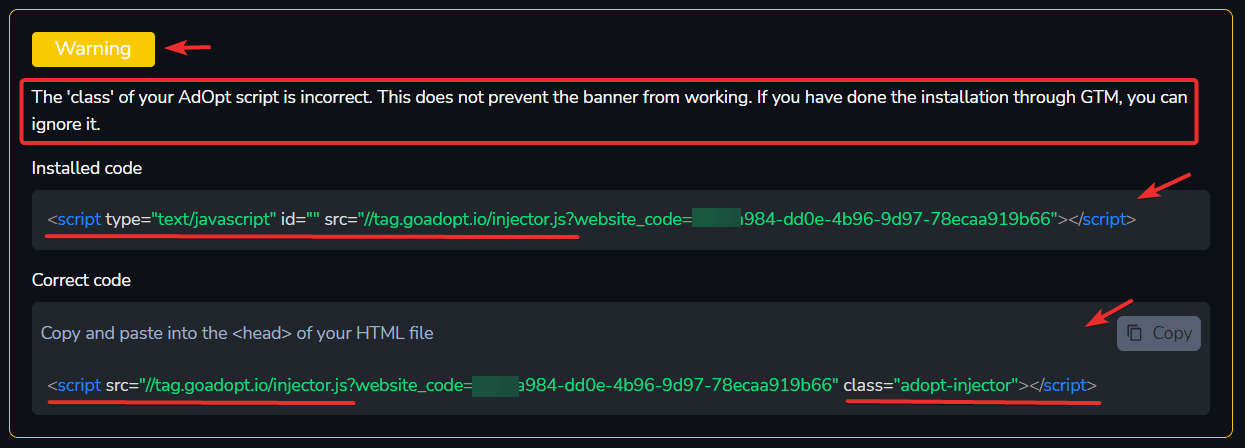
For some reason, the class of the banner was changed, which may or may not influence the behavior of the banner. Check if the banner is being activated on your website. If it is working normally, ignore this warning.
In some cases, changing the content of the tag may interfere with its activation, as explained in the guide: cache error
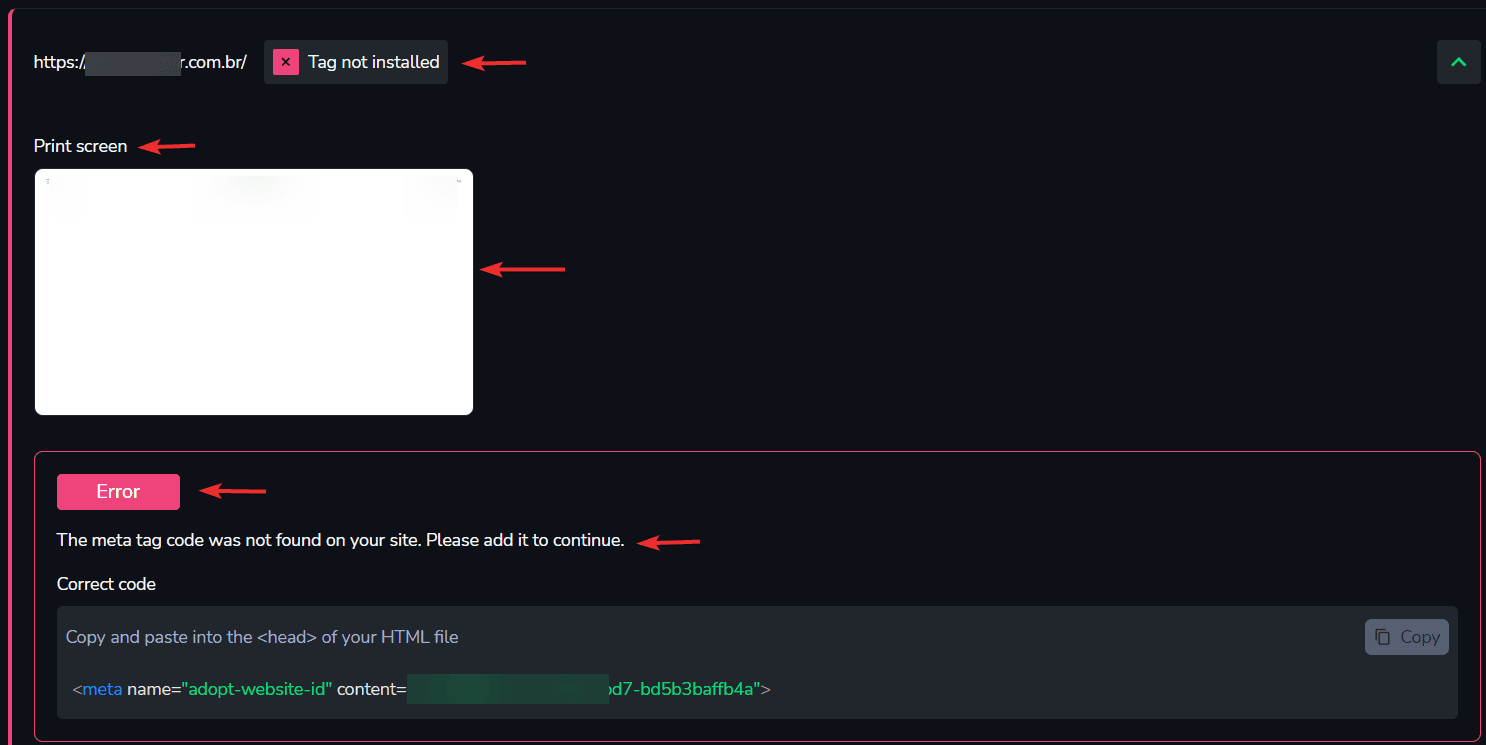
Errors are system responses that identify errors in the activation or behavior of the Tag.
Error messages are critical and interfere with the functioning of AdOpt.

In the case below, it is a common error indicating that the tag was not installed or is not yet on the website.
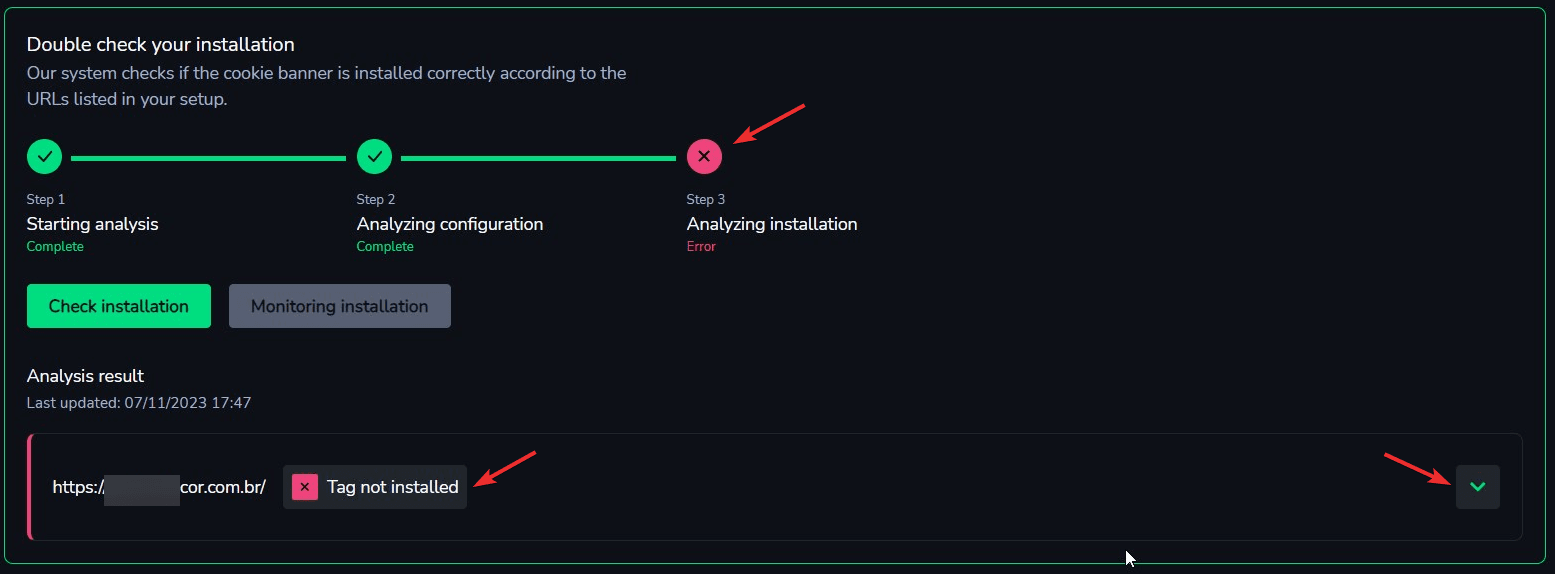
The detailed error message usually includes a code, a screenshot of the analysis, and a suggested solution.
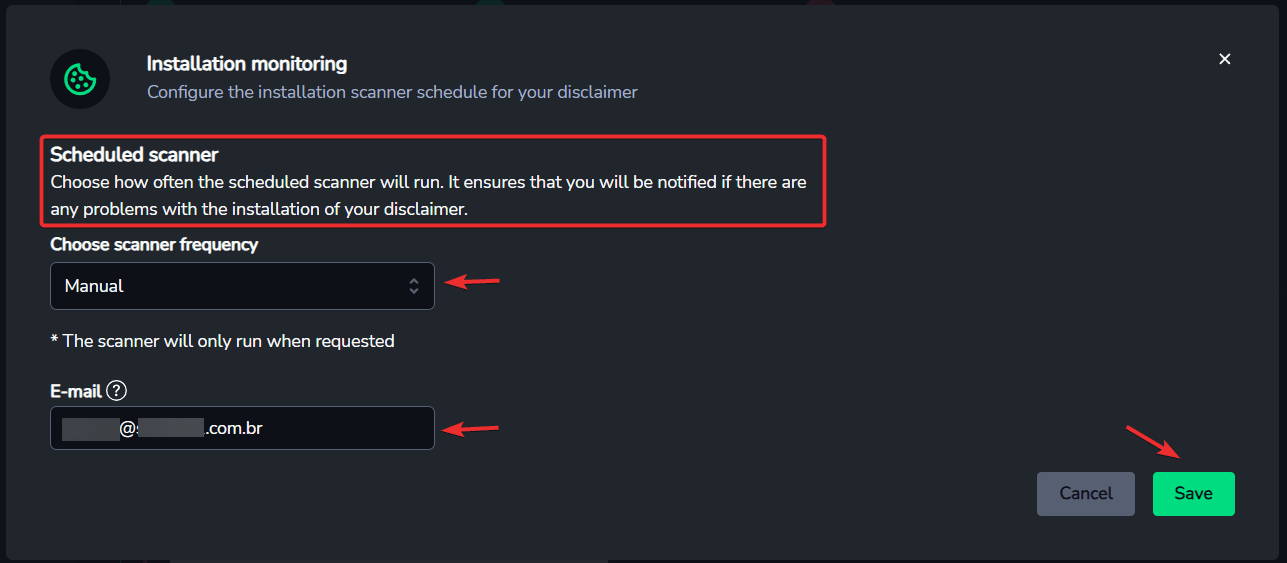
In this feature, you can configure the installation analysis periodically. You can choose between weekly or monthly frequency and register an email to be notified with the analysis results.
AdOpt
Resources
Legal Terms
© GO ADOPT, LLC since 2020 • Made by people who love
🍪