Blocking via GTM (Google Tag Manager)
AdOpt is fully capable of performing automatic blocking, here in this tutorial you learn how to do it via Google Tag Manager.
Here are the steps
The 3 steps below must be performed individually, from start to finish, FOR EACH TAG added under AdOpt management.
Therefore, for each new TAG installed, the procedure will have to be fully done.
- Select the ID of your TAG within Adopt's platform.
- Understand if your TAG Manager usage is Simple or Advanced.
- Repeat the process within each usage mode, with all the TAGs you want to integrate with AdOpt.
Log into our platform, select your disclaimer, and go to the tags section.
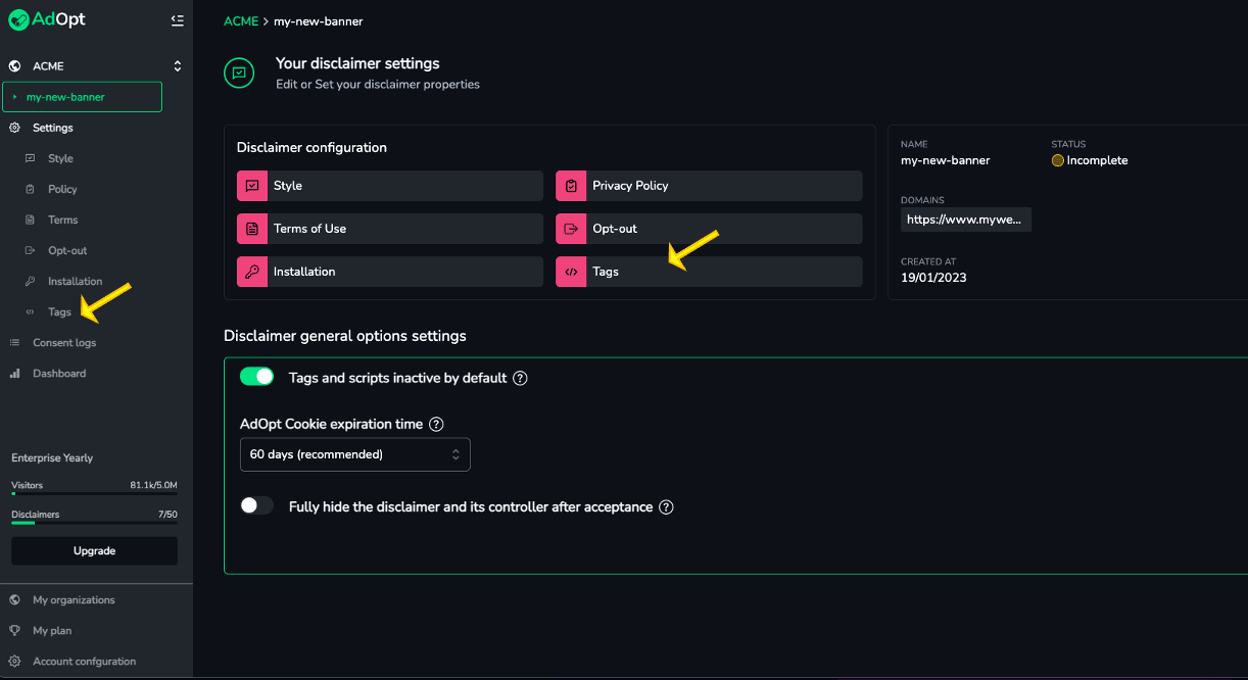
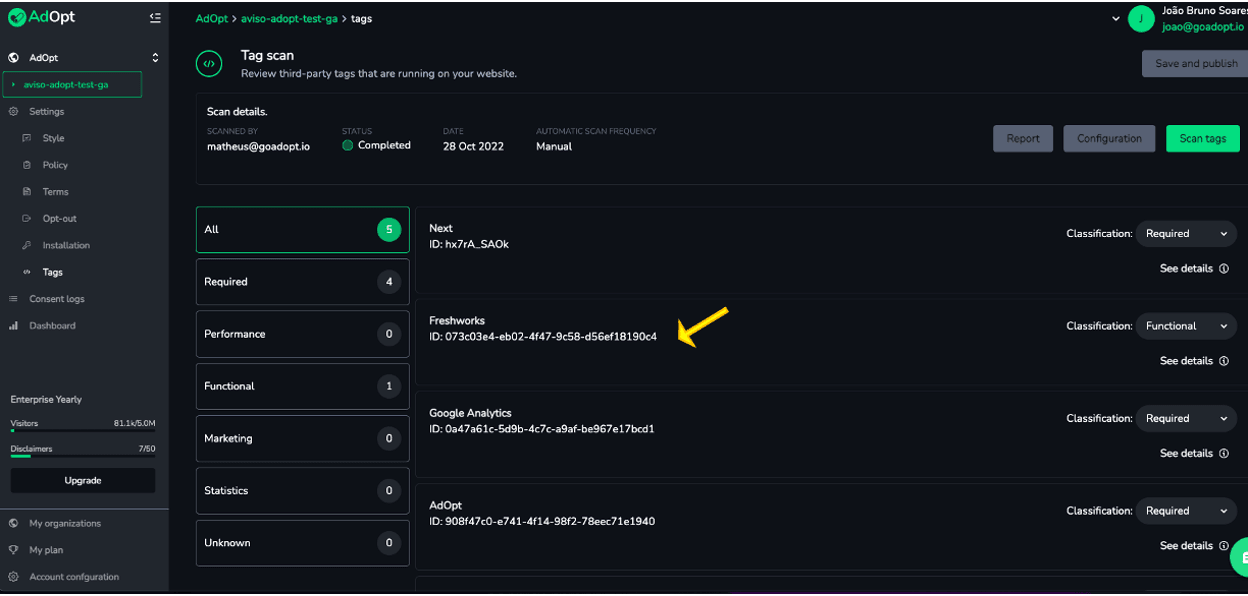
Once there, copy the tag id that you want to set up. *Keep this ID, because we will use it later - inside Google Tag Manager (GTM)
Now go to your Google Tag Manager, select your website, the workspace where your tags are, and select the tag to be configured.
Here, there are two paths, according to the way you use your Google Tag Manager to configure your Anaytics events and other tags. For this, we divide the two between SIMPLE or ADVANCED.Important
The tag's trigger is a simple pageview, i.e. simply loading the page triggers the tag. In this case, we will replace the trigger with a "Custom Event".
The tag has a more elaborate trigger, such as words in the url (regex), click events, page scrolling, etc., or even a combination of these. In this case we will set up the existing trigger with an additional condition.
To start with, select the tag, opening the "tag setup" part.

In the triggers part, remove the current trigger, "Page View".
NOTE: You can remove this trigger after you set up the Custom Event, no problem, but in the end, the Custom Event type trigger should be the only trigger for this tag.

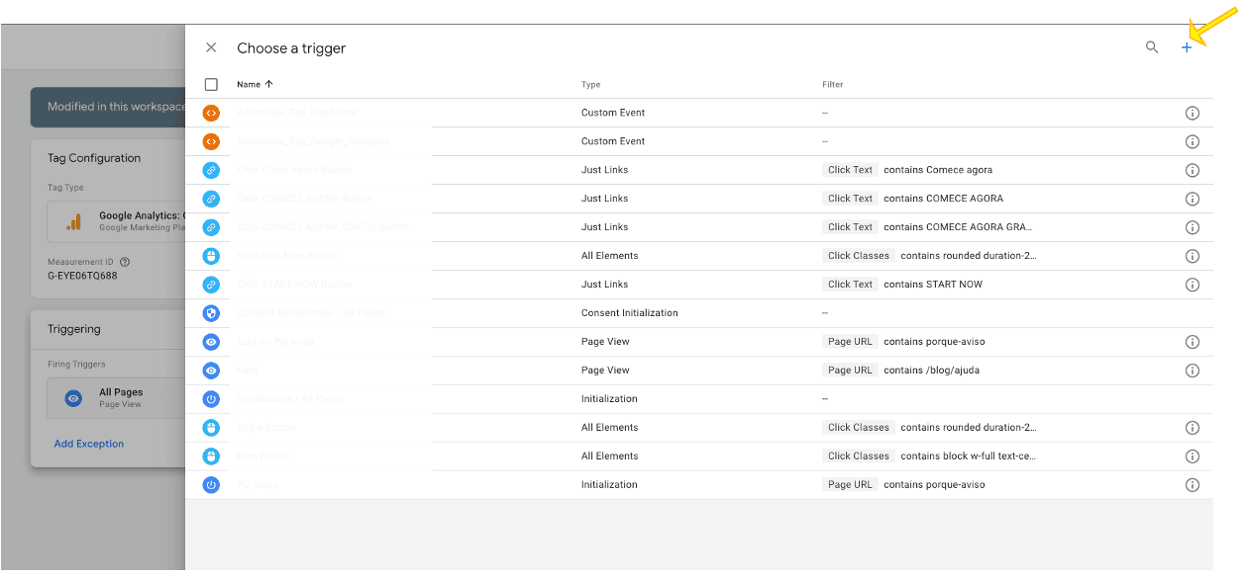
To setup the new trigger, click anywhere in the triggers area, opening the menu with your already configured triggers, or used in other tags.
In the upper right corner, click the "+" sign
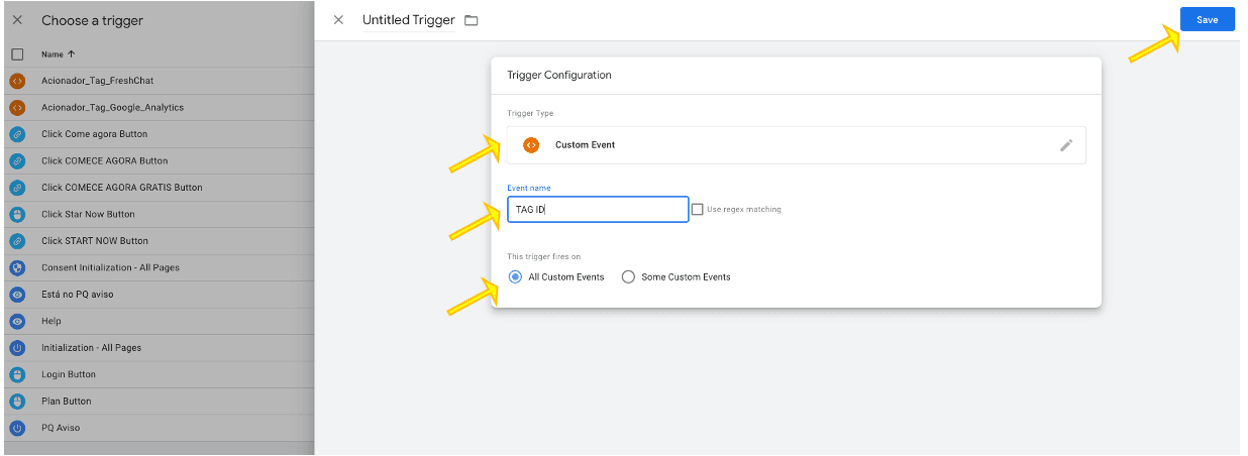
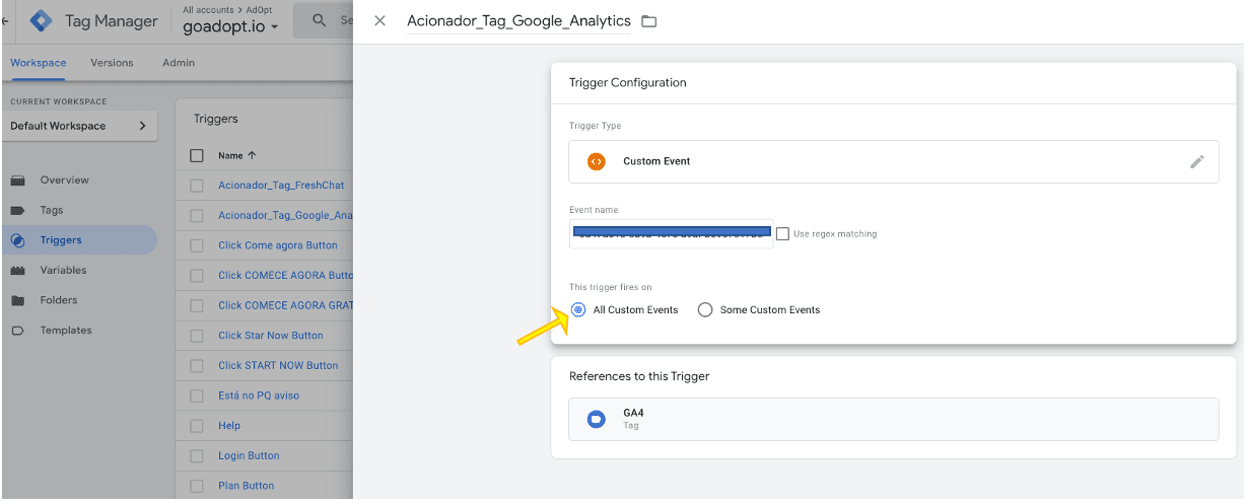
Click anywhere in the "Trigger Configuration" area, opening the menu of trigger types. There, select "Custom Event".

In the "Event name" field, enter the id of the tag that we copied at the beginning.
Make sure the option "All custom events" is checked.
If not, check this option, and click "Save" in the upper right corner.
If you have not entered a name for this trigger, do so in the small window that opens.
Choose a name that you know that this trigger is the specific trigger for the tag that we are setting. _E.g._TAG_X Trigger ... _TAG_Y Trigger ... TAG_Y Trigger (remember that for each new tag, we will have a new setup, so a new trigger will be configured...)
Once this is done, you will be back in the tag setup, but now with the new trigger configured.
If you have not removed the default pageviews trigger, now is the time. With the trigger we just set as the only trigger for your tag, click "Save" in the upper right corner, and voilá, we have just reconfigured one of your tags.
**Repeat these steps for each of the tags that need to be reconfigured, and that are triggered on all pageviews.
Once you have finished configuring all the tags, do not forget to "Submit" and "Publish" your changes.**
Another option to implement blocking would be to use the events triggered when a category is accepted. This option offers greater ease if you have many tags but less granularity, since the event is only triggered when the ENTIRE category is accepted.
These are the category IDs:
- Necessary -> adopt-accept-required
- Marketing -> adopt-accept-marketing
- Statistics -> adopt-accept-statistics
- Performance -> adopt-accept-performance
- Functional -> adopt-accept-functional
Select the tag, and click on the trigger that is already configured, opening the trigger setup. There, click on the trigger again, to show its options.
If "All (...)" is checked, it means that you do not have any other rules yet. Check the option "Some (...)", displaying new fields, to configure the rules.
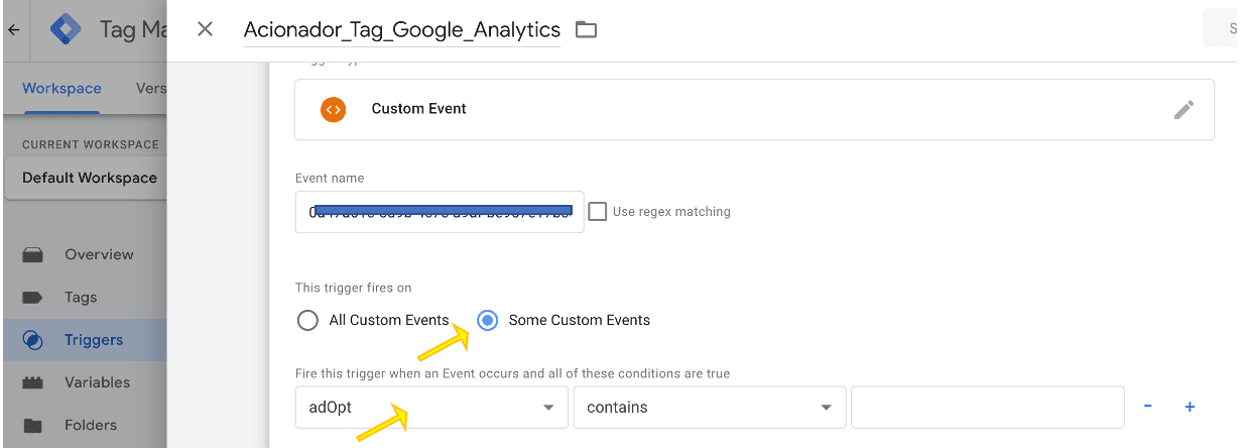
If you already have some rules set up, click on the "+" sign to insert a new rule.
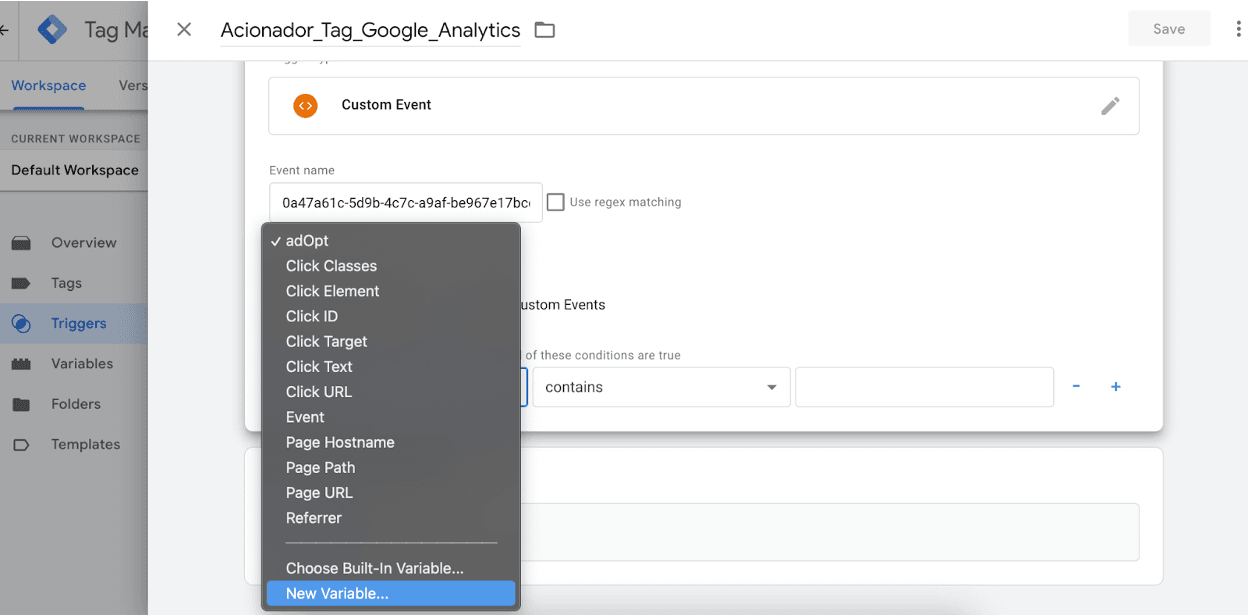
In the first field, select "New variable...", and in the menu that opens, click on "Variable Configuration", and in the variable type, choose the "JavaScript Variable" option.
Do not confuse this with "Important

In the "Global Variable Name" field, enter the value "window.acceptedTags",<u> exactly as it is written here. </u>
ATTENTION: Make sure that you enter these words exactly as they are in this tutorial, without spaces and observing uppercase and lowercase letters, and without the quotation marks.

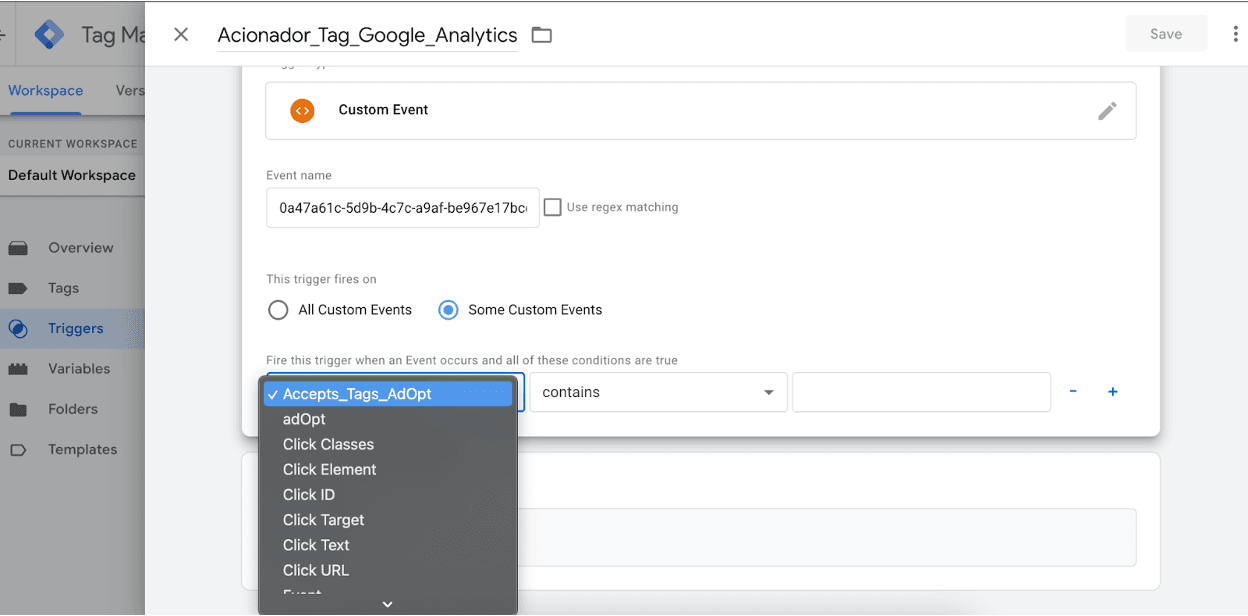
In the variable name, this time you can choose some generic name, such as "Accepted_Tags_AdOpt" ou "AdOpt", because this same variable can be used to configure other triggers of this same advanced setup.
Click save, in the upper right field.
(From now on, all steps should be repeated using the same variable, to block all tags used)
Below is the step-by-step:
1 - Going back to the trigger configuration, make sure the first field is with the variable you just created. 2 - In the second field, select the "contains" option. 3 - In the last field, enter the AdOpt tag id copied at the beginning of this tutorial.
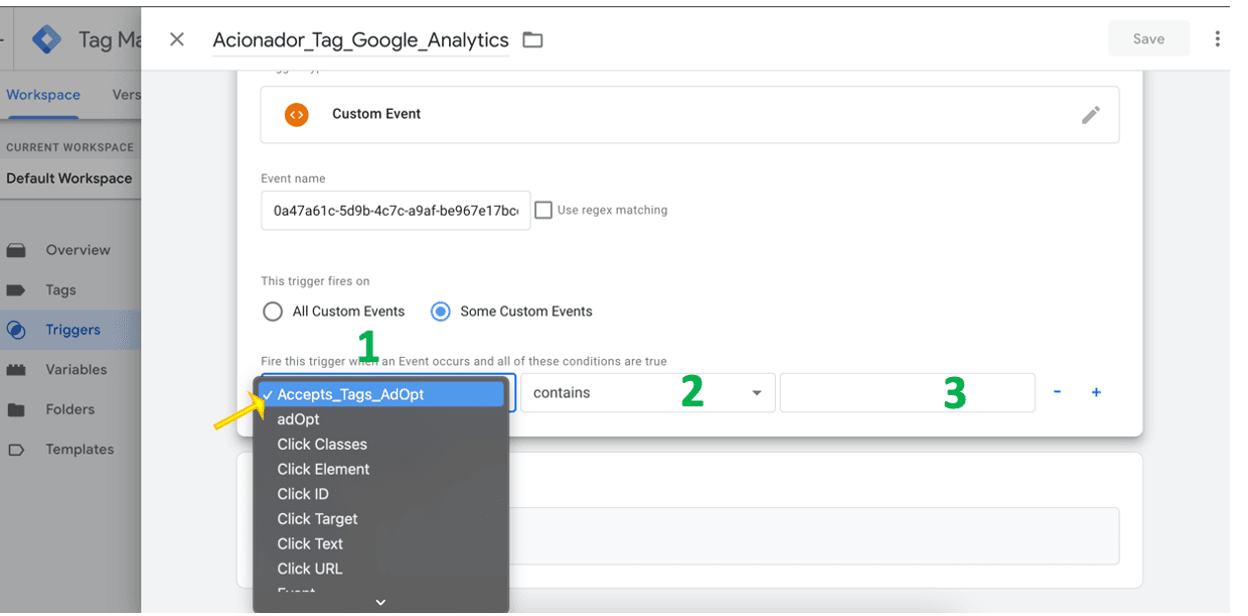
4 - Click "save", and voilá, your tag is configured.
Repeat the last steps 1 to 4, (except for the variable creation), for all your tags that have more advanced triggers, simply by selecting the variable name you just created in the first field of the extra trigger rules.
AdOpt
Resources
Legal Terms
© GO ADOPT, LLC since 2020 • Made by people who love
🍪