How do I check if Google Consent Mode v2 is active on my website?
If your metrics are normal, there is no need to make the following adjustments. If you do so and the changes do not bring the desired/expected result, you can restore the previous version within your Google Tag Manager. With that said, we recommend that you keep an eye on the metrics and compare whether there has been an advantage for your business.Tip
After installing the Tag via Google Tag Manager and following the Google Consent Mode installation tutorials, go to the AdOpt dashboard and activate the Installation Check in the installation section of your notice.

If there is still any error in your configuration, the system will show this warning:

This check is a bit more detailed but will help you understand the installation details and how data is being sent to Google after consent.
For this check, Google itself has created a Tag Assistant that does this job.
In this step, we'll show you two checks, one no-code, and another looking at the code with Google's documentation.
Here is the official Google documentation for the Tag Assistant.
If you don't understand programming but have access to GTM, you can also do a no-code check. Below is a step-by-step guide.
-
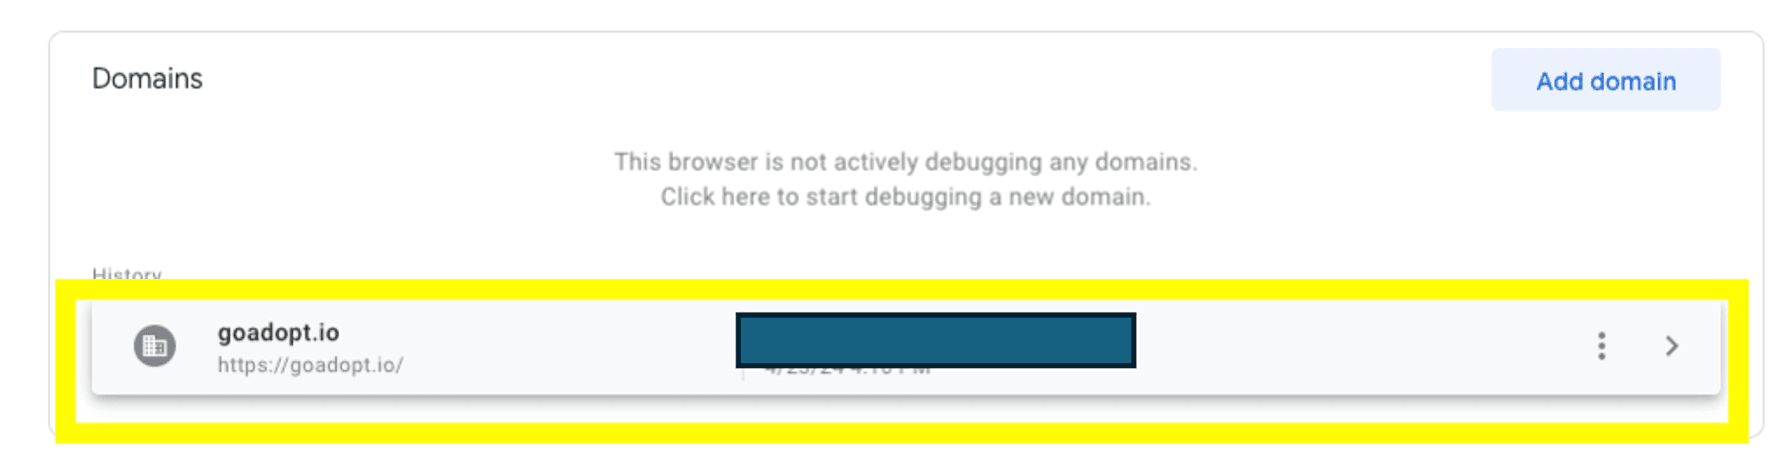
Access the Tag Assistant with the same email as the GTM installed on the site to be verified.
-
Enter your domain and give permission for the Assistant to perform debugging, within GTM.

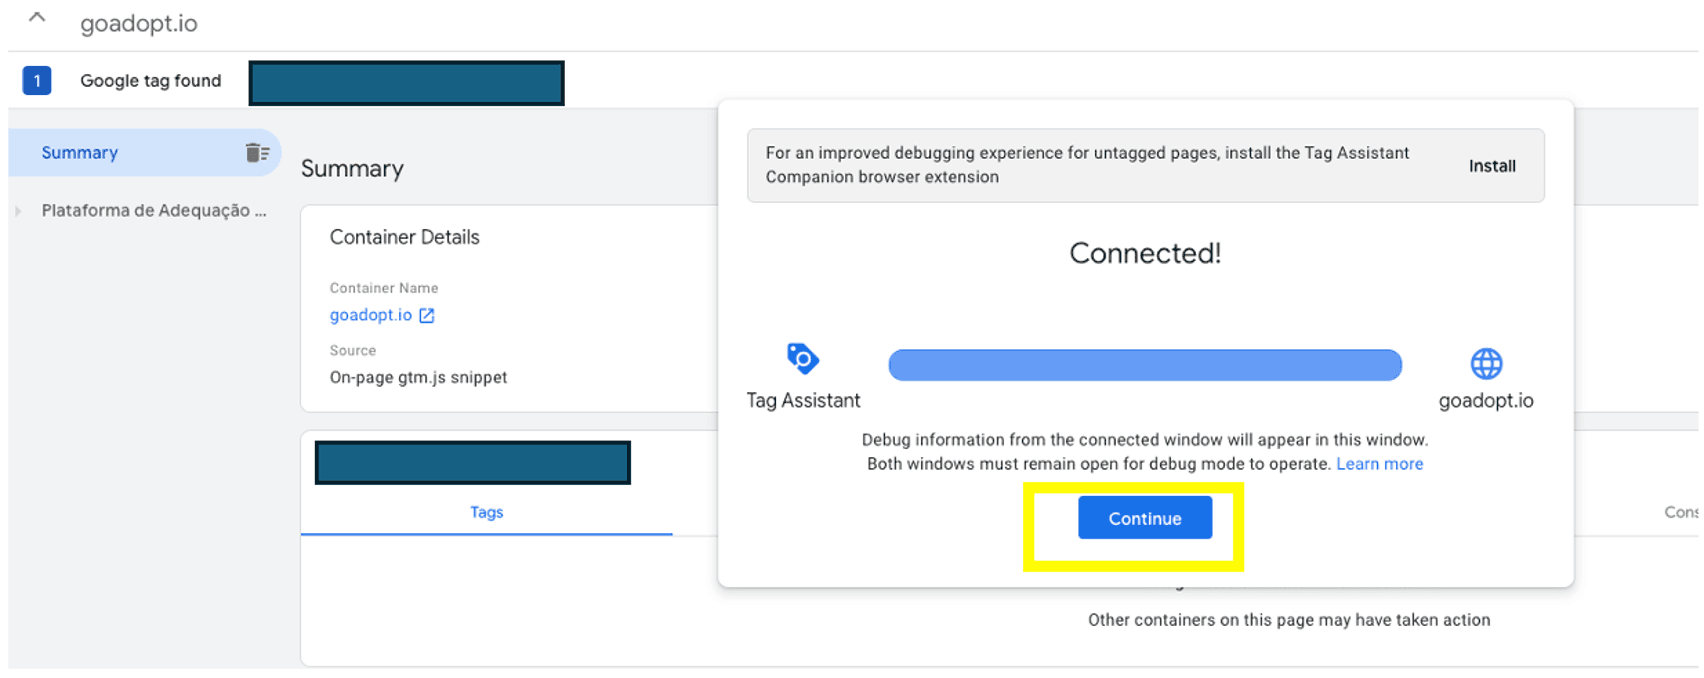
- Click on the generated card, it will have the ID of the GTM containers identified on it.
- It will open a pop-up with a new page in your browser, while loading a verification status.
Once connected, click continue.
-
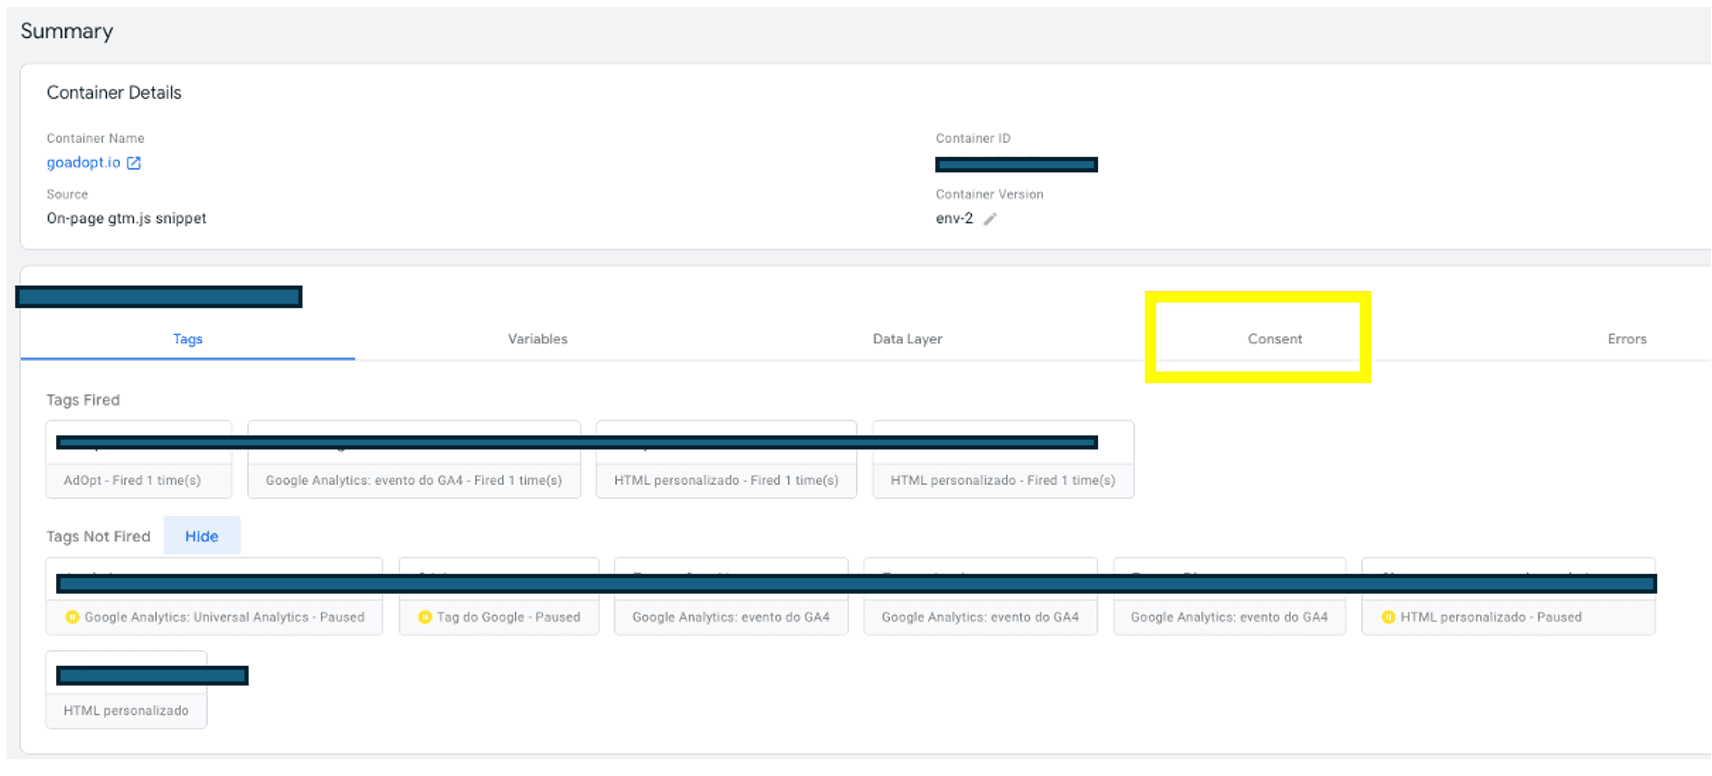
It will show a summary with all tags fired and not fired, according to your configuration where you classified the tags as: Granted or Denied.
-
Click on Consent.
-
Now, go to the pop-up screen opened by the verifier, and give consent to the installed cookie notice.
-
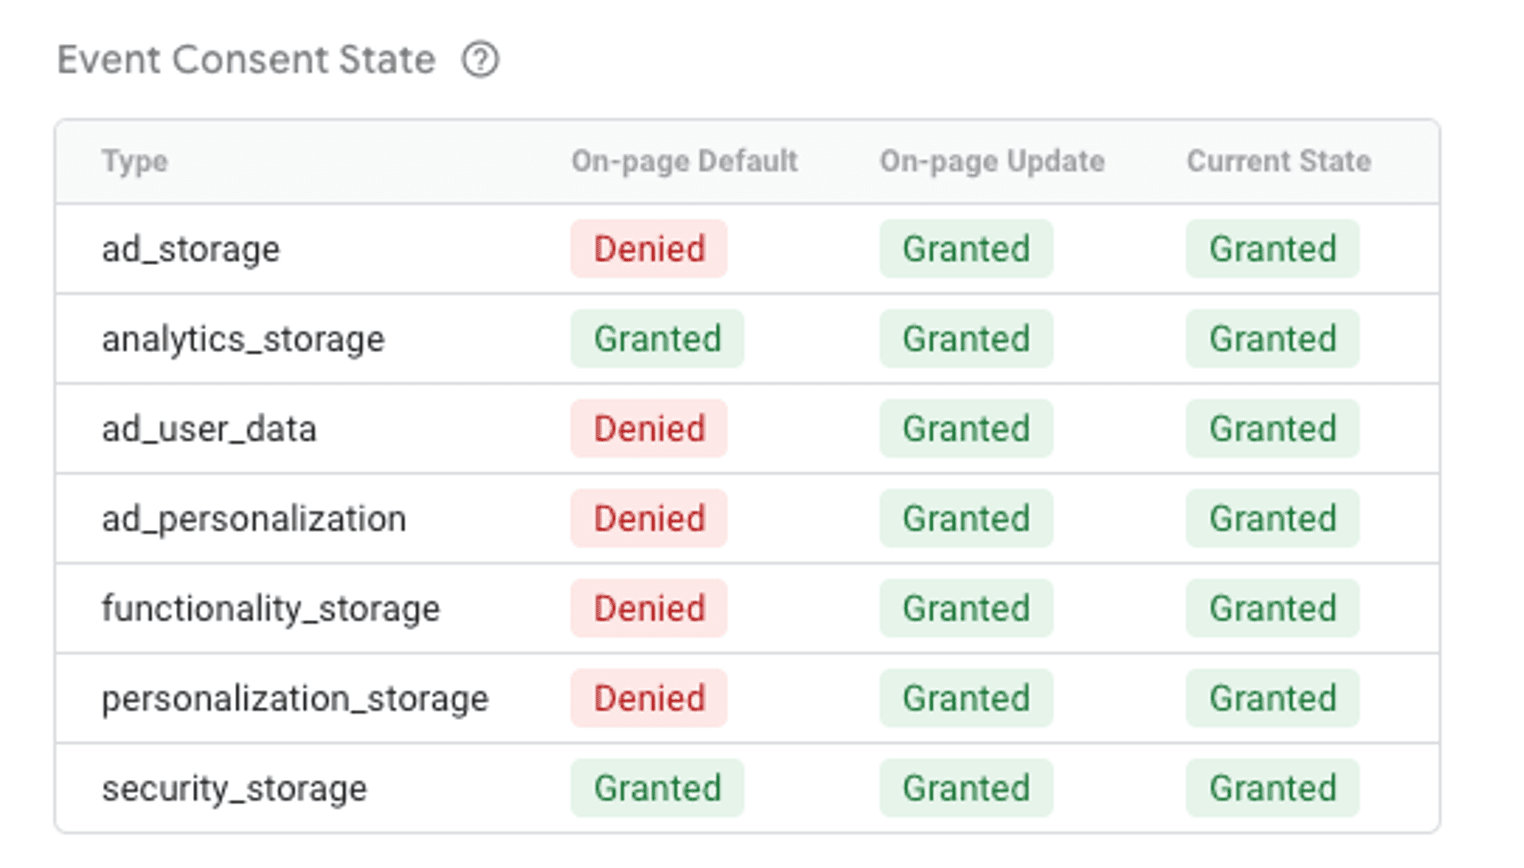
After giving consent, go back to the assistant screen and see the list of events in the left column.
-
Look for consent events and click on them.

- You will have a table, like the one below, showing the events fired for each "consent type" received by Google. The "On-page Default" being the default you configured in the template and the "Current State" being the state of the tags after approval with the given consent.
If you are a developer, Google explains the step-by-step process for checking API calls, etc. (Below are images from the documentation).
Here is the complete documentation. Follow these guidelines:
Open your site in an incognito or private browsing window to ensure a clean cache.
Use your browser's developer console and type "dataLayer" to access the corresponding object.
Look for the first "consent" event. Check if the
analytics_storageAccept all cookies from your cookie banner, or at least the categories related to Google services.
Monitor any changes in the "consent" event within the
dataLayeranalytics_storageIf all steps are completed without issues, Google Consent Mode will be properly installed and functioning on your site!
🔎 For more information about consentMode, check the official Google guide. And remember, if you detect issues related to the absence of Consent Mode or TCF signals on Google tags, please contact AdOpt first.
AdOpt
Resources
Legal Terms
© GO ADOPT, LLC since 2020 • Made by people who love
🍪