How to setup the AdOpt scanner in an authenticated environment?
Check the availability of this feature in your plan.
In this guide, we will cover:
- What is the authenticated scanner?
A brief explanation of the purpose of this feature. - Step-by-step guide on how to use the authenticated scanner.
Instructions on how to configure this feature in AdOpt.
The authenticated scanner is a feature in AdOpt that allows the reading of cookies in logged-in areas that require authentication or login confirmation.
In logged-in areas, your website often uses specific services that rely on cookies and local storage to store data and ensure better functionality for these sections.
With this in mind, AdOpt developed this feature!
Now, you can configure AdOpt to scan a specific URL within the logged-in area of your website automatically.
To do this, simply follow the configuration steps below to scan your URL, thereby complementing the list of cookies in the Disclaimer.
- Log in to your AdOpt account.
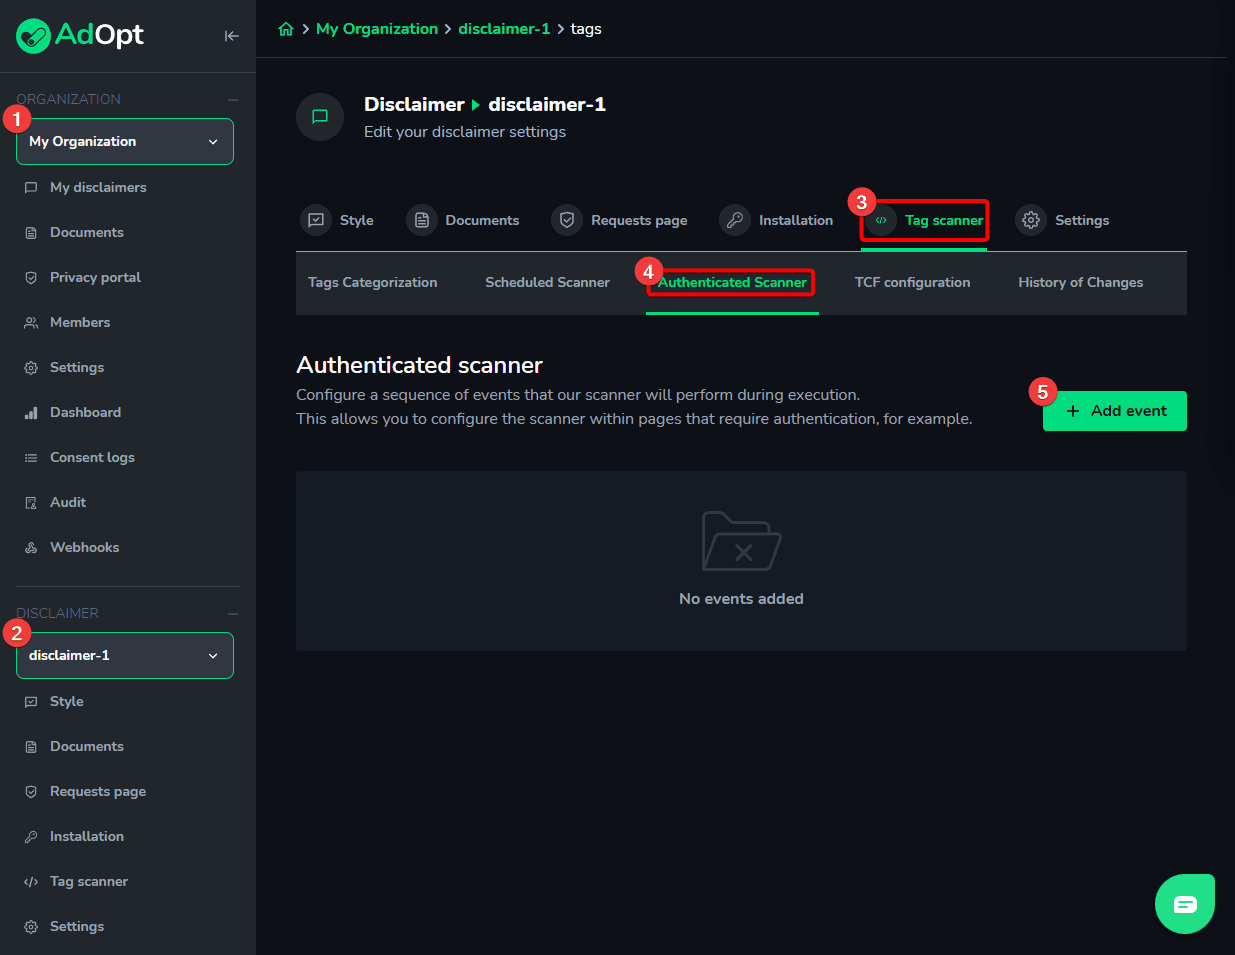
- Select the (1) Organization in which the Disclaimer with the site to be scanned is inserted.
- Choose the (2) Disclaimer in question from the left sidebar menu.
- Access the (3) Tag Scanner section of the Disclaimer.
- Click on (4) Authenticated Scanner.
- Click the (5) + Add event button to configure your "Authenticated Scanner" event.
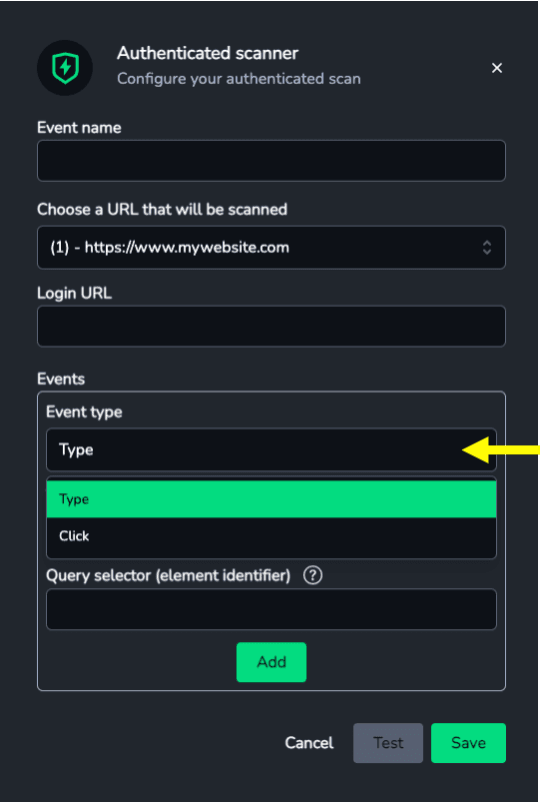
When you click "Add event," a window will open, allowing you to configure each step of this authentication process. Follow the steps and images below to understand how this configuration works.
1 - Name the event. E.g.: Checkout
2 - Enter the URL that needs to be scanned, inside the logged in area (it needs to be already added back there on the "create disclaimer step").
3 - Enter the login URL.
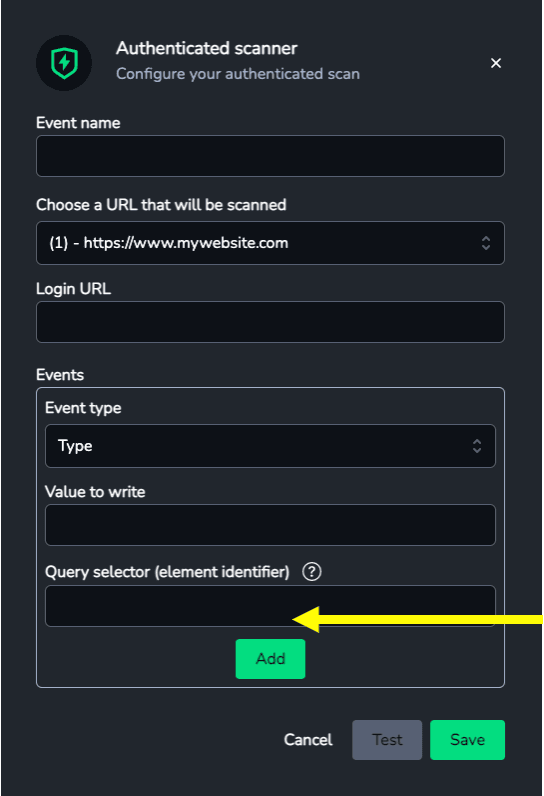
4 - Create events as a step by step required to login.
- Type = Text fields
- Click = Buttons and check-boxes.
5 - Go to your login page and, with the right button, inspect the element that receives the event.
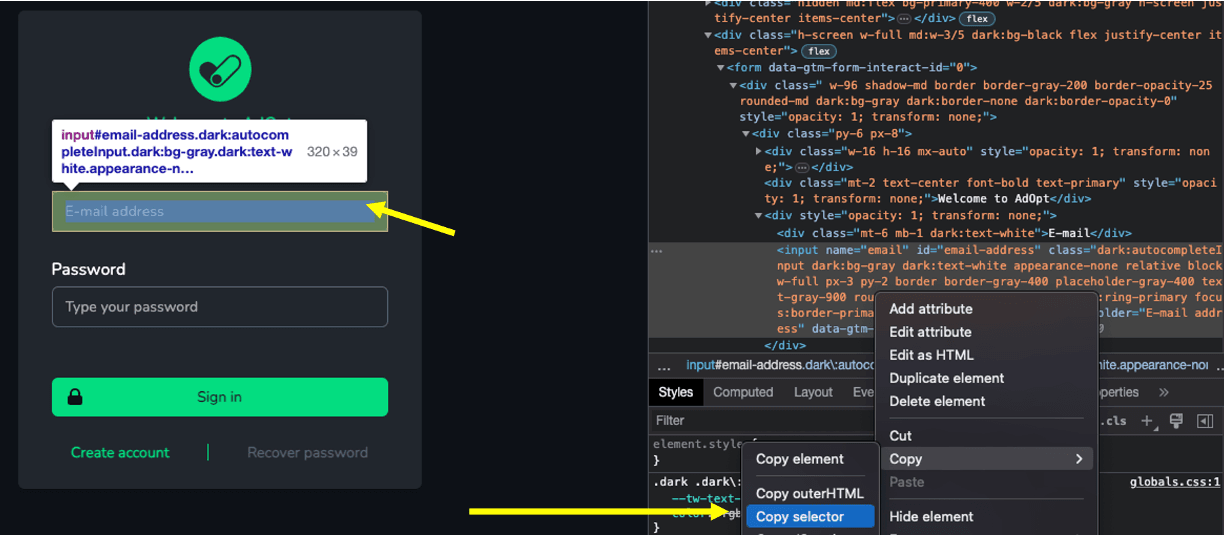
6 - Right-click on the highlighted element.
7 - Select "Copy Selector" from the copy menu.
authenticated-scanner-setup_6.png
8 - Paste in the field "Query selector".
That's it! These are all the configuration steps for this feature.
Did you have any questions? Did you encounter any difficulties?
Contact us via Chat or [email protected].
Sincerely
Support team - AdOpt
AdOpt
Resources
Legal Terms
© GO ADOPT, LLC since 2020 • Made by people who love
🍪